How to Post Your First Request Form
Table of Contents Introduction With the 3.17 ...
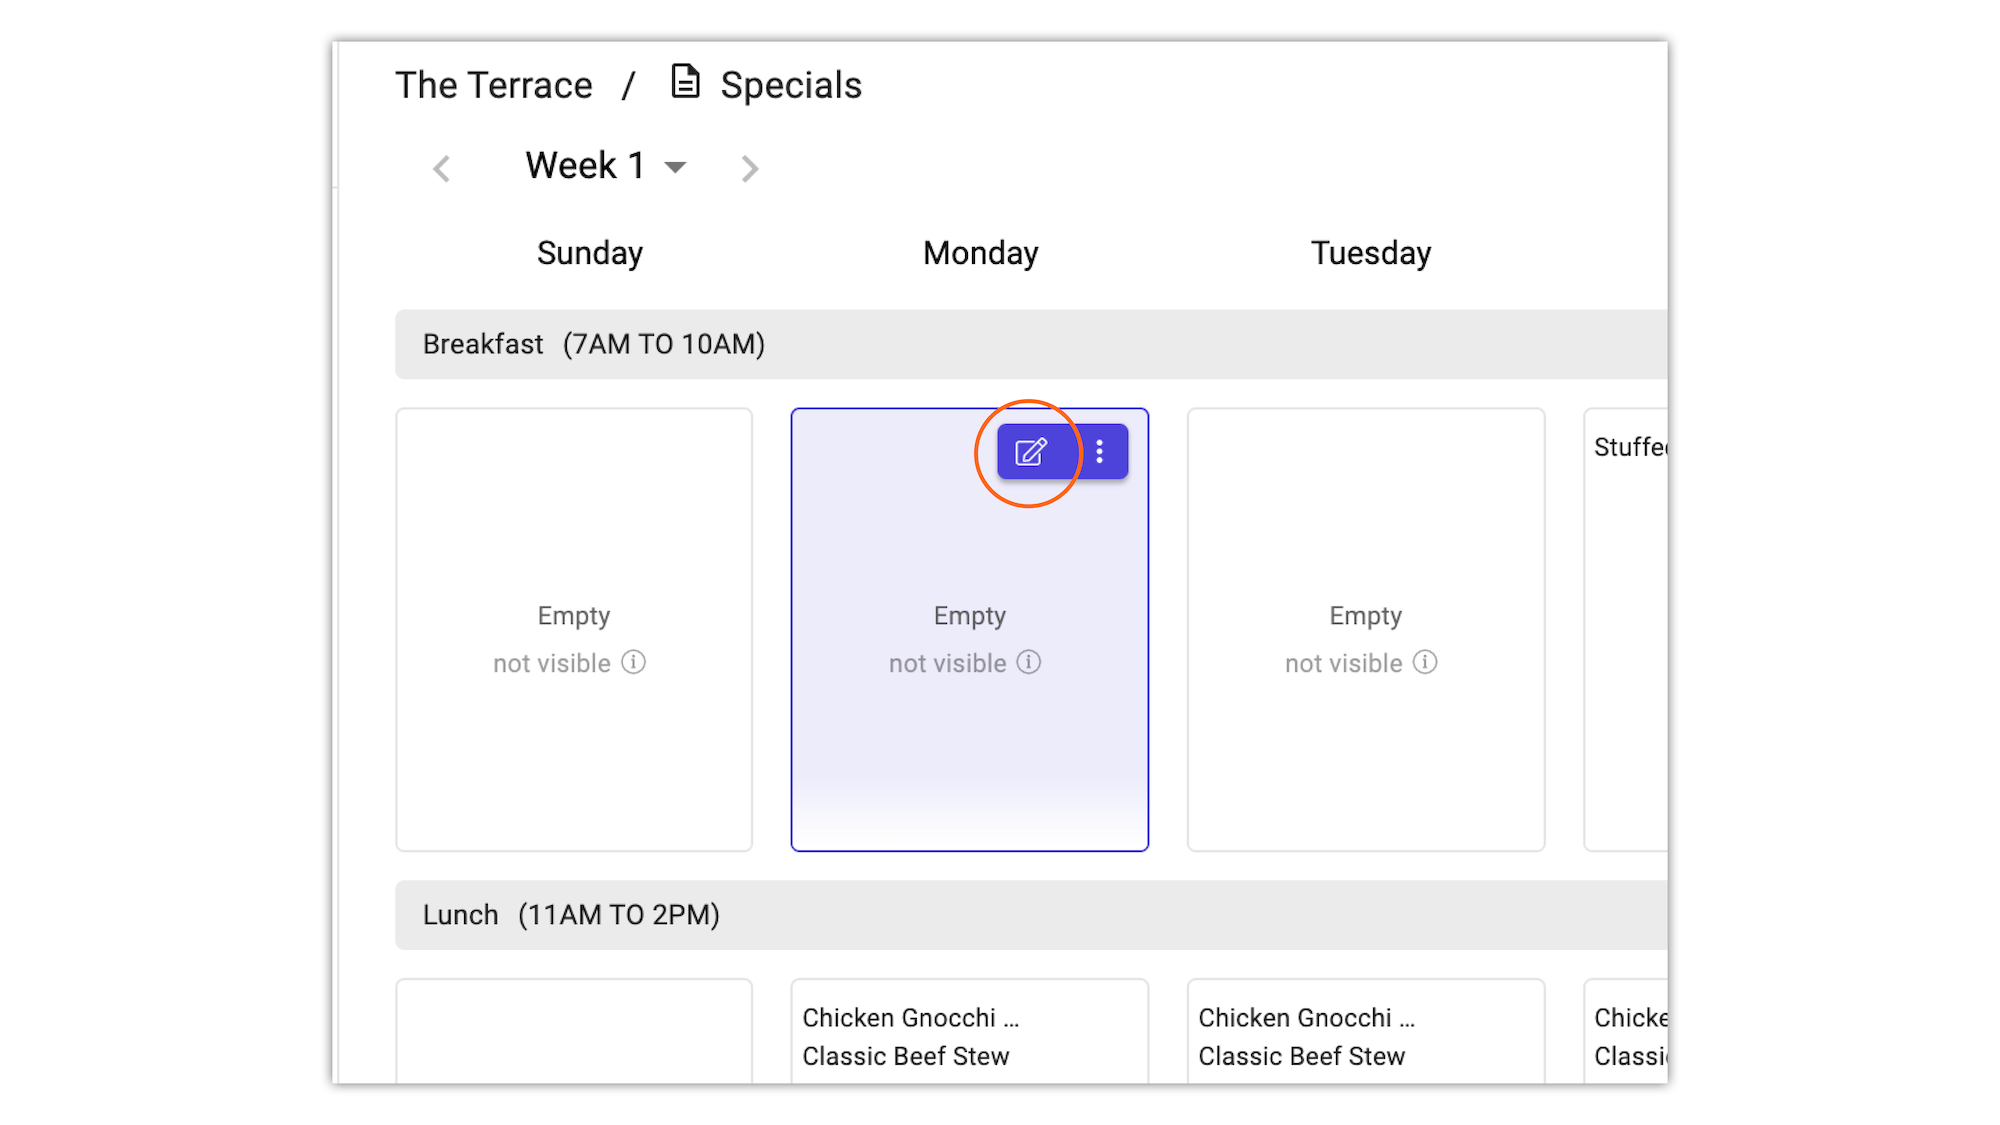
In the top right corner of a singular menu grid, click the edit button (pencil and box icon).
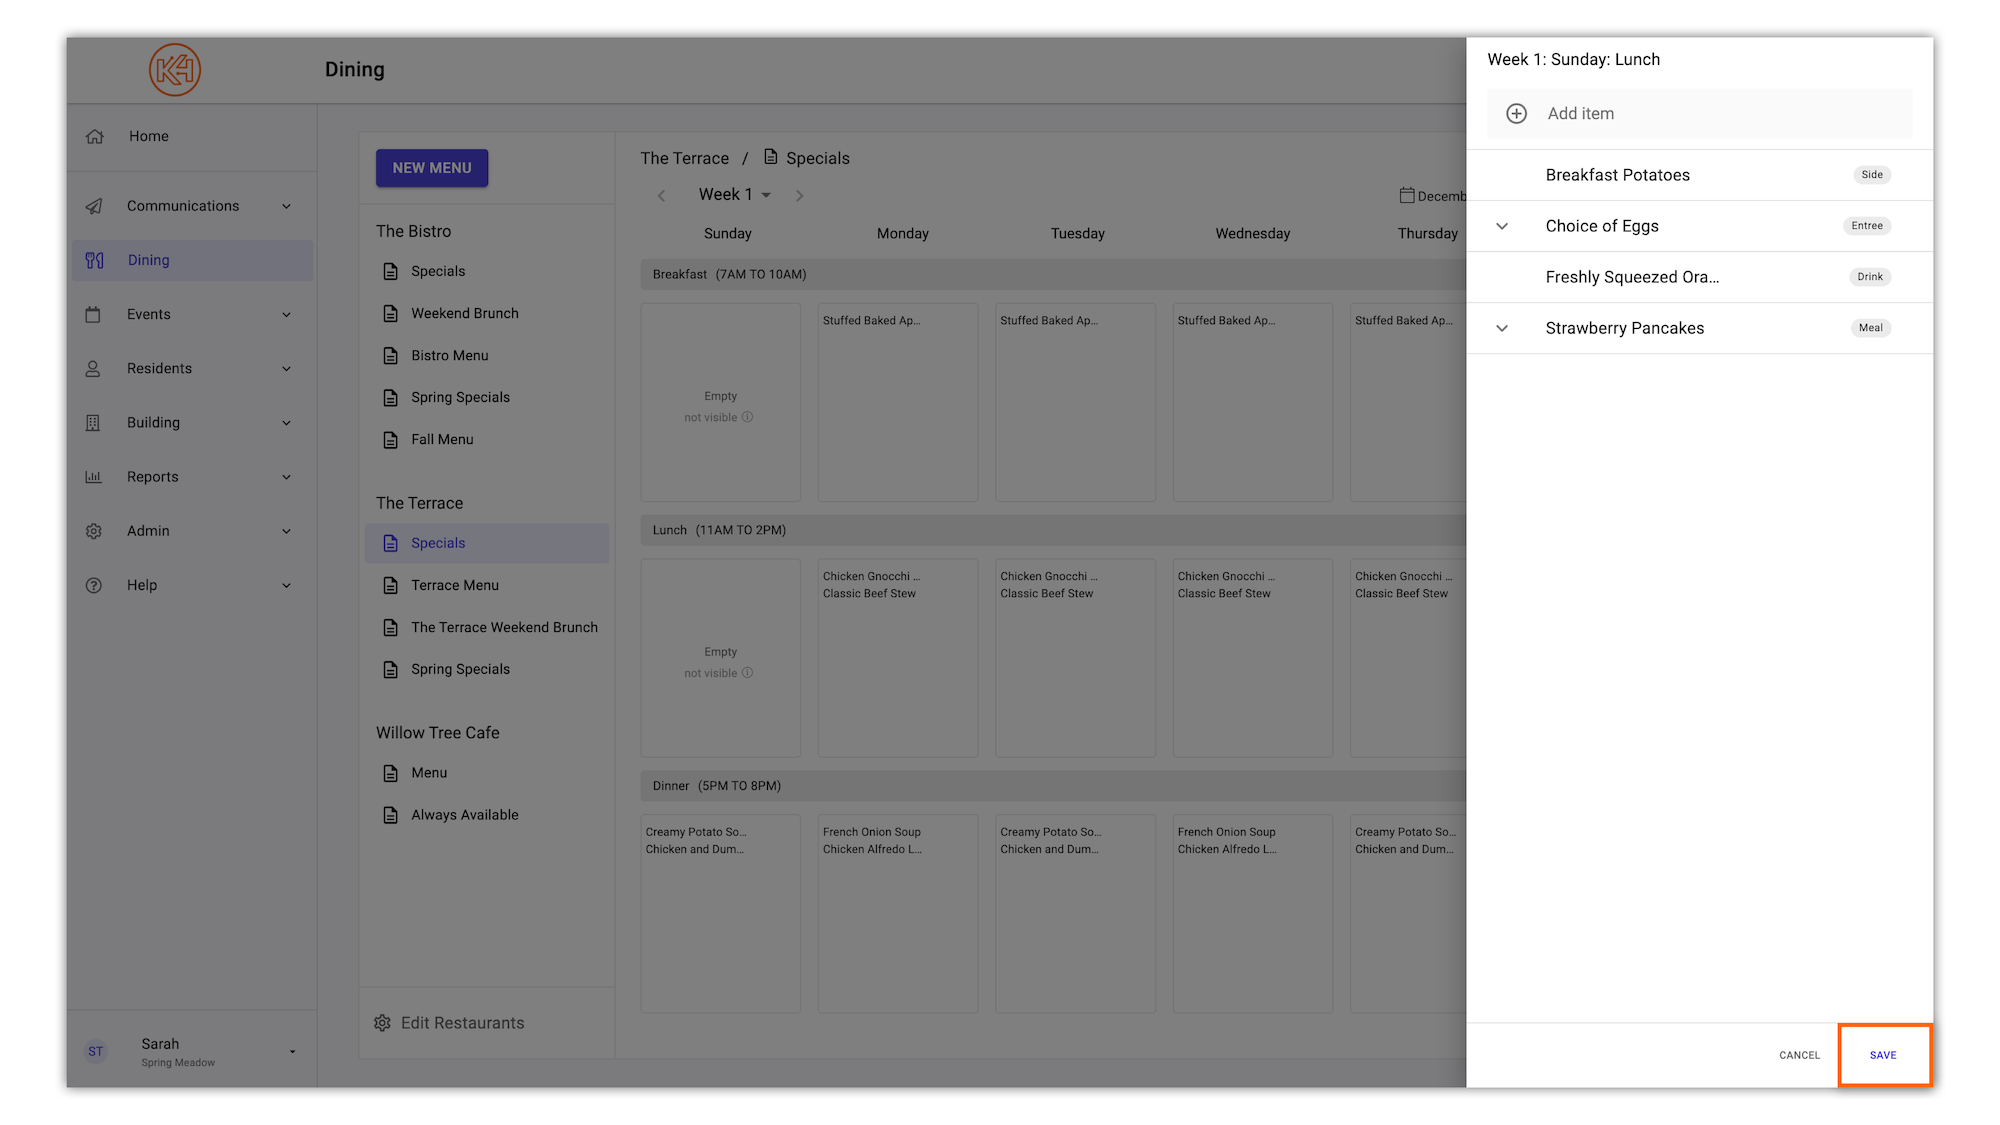
This will generate a side panel with an 'Add Item' field. As you are initially getting started, this side bar will be empty.

To add an item, begin typing in your desired item in the 'Add Item' field. If the item has already been created, a list will appear of items matching the term typed in the field. Click 'ADD' to the right of your desired item.
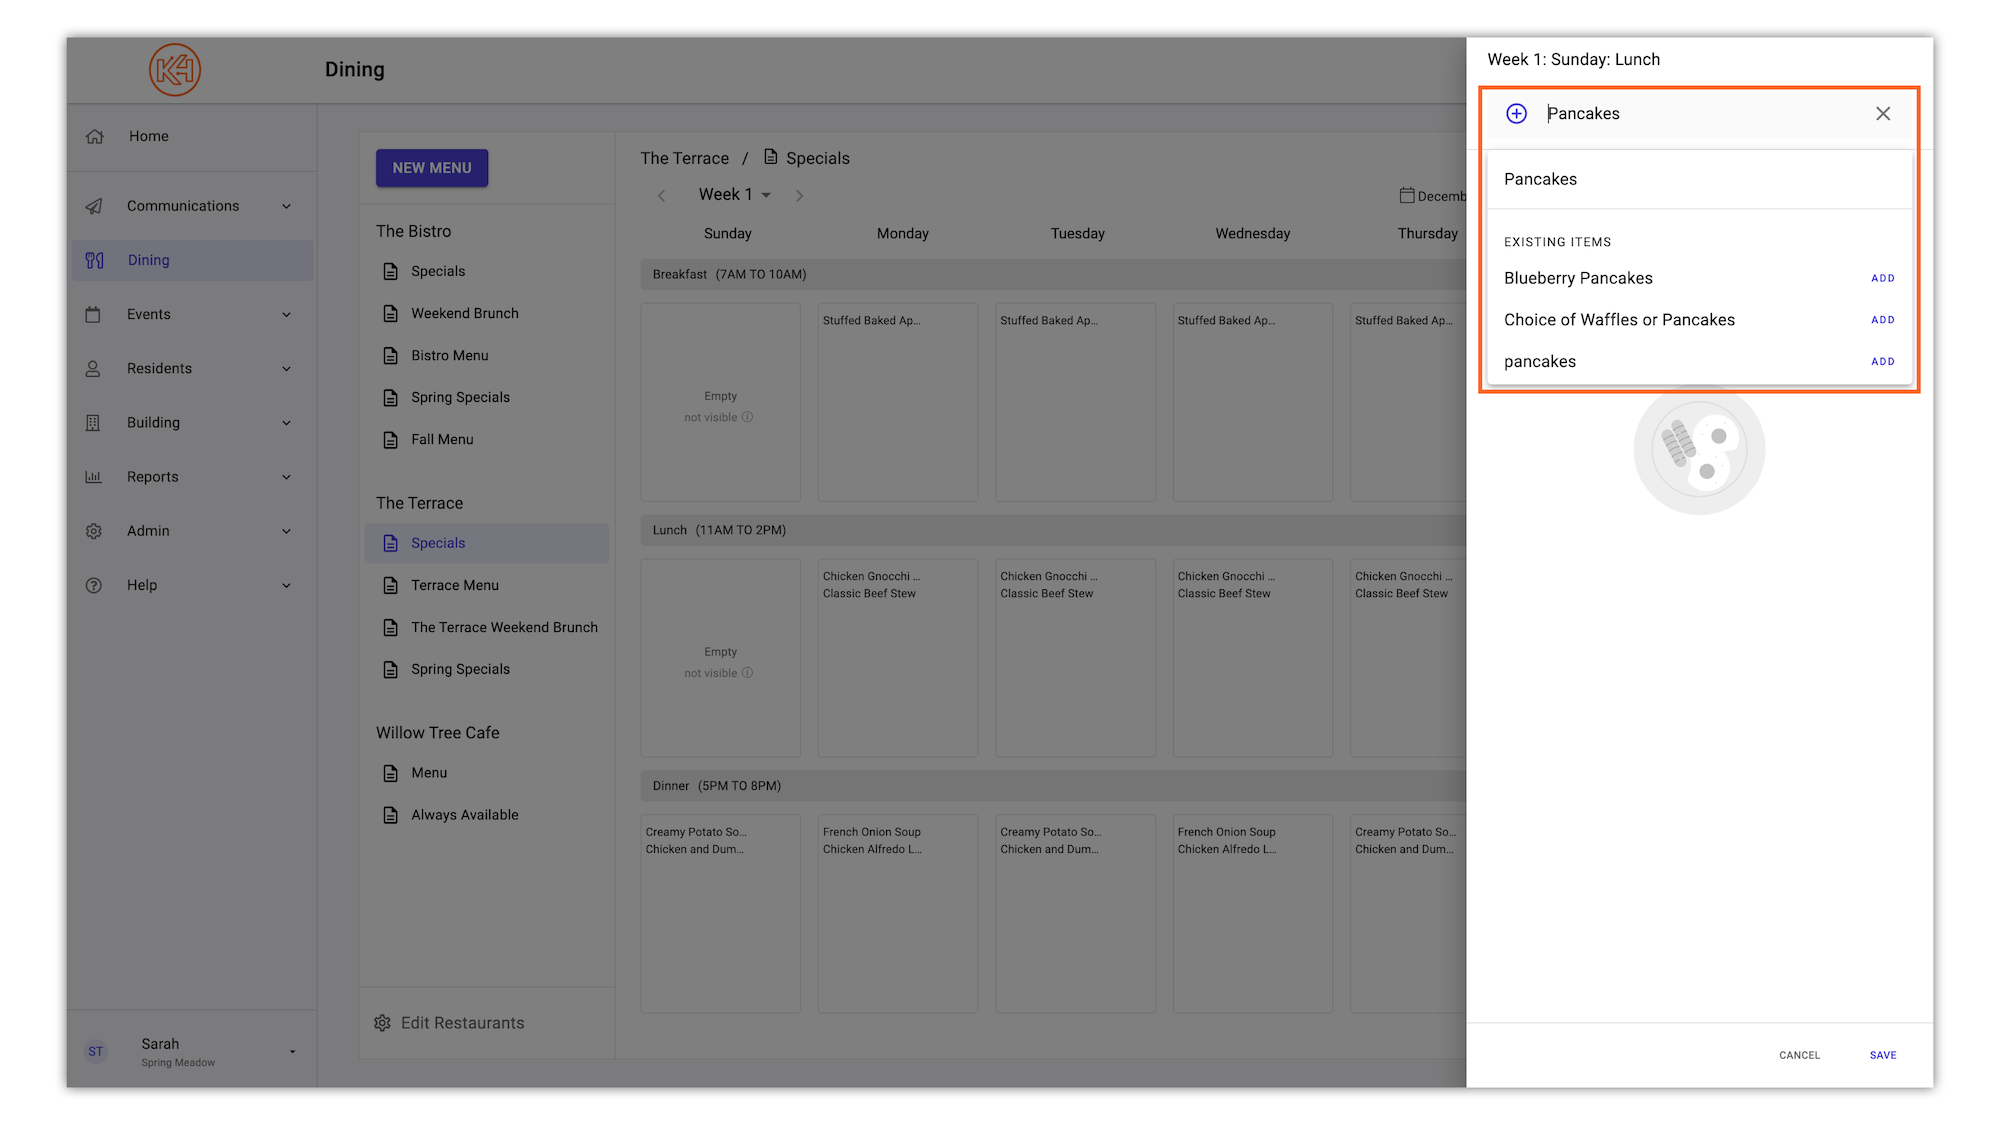
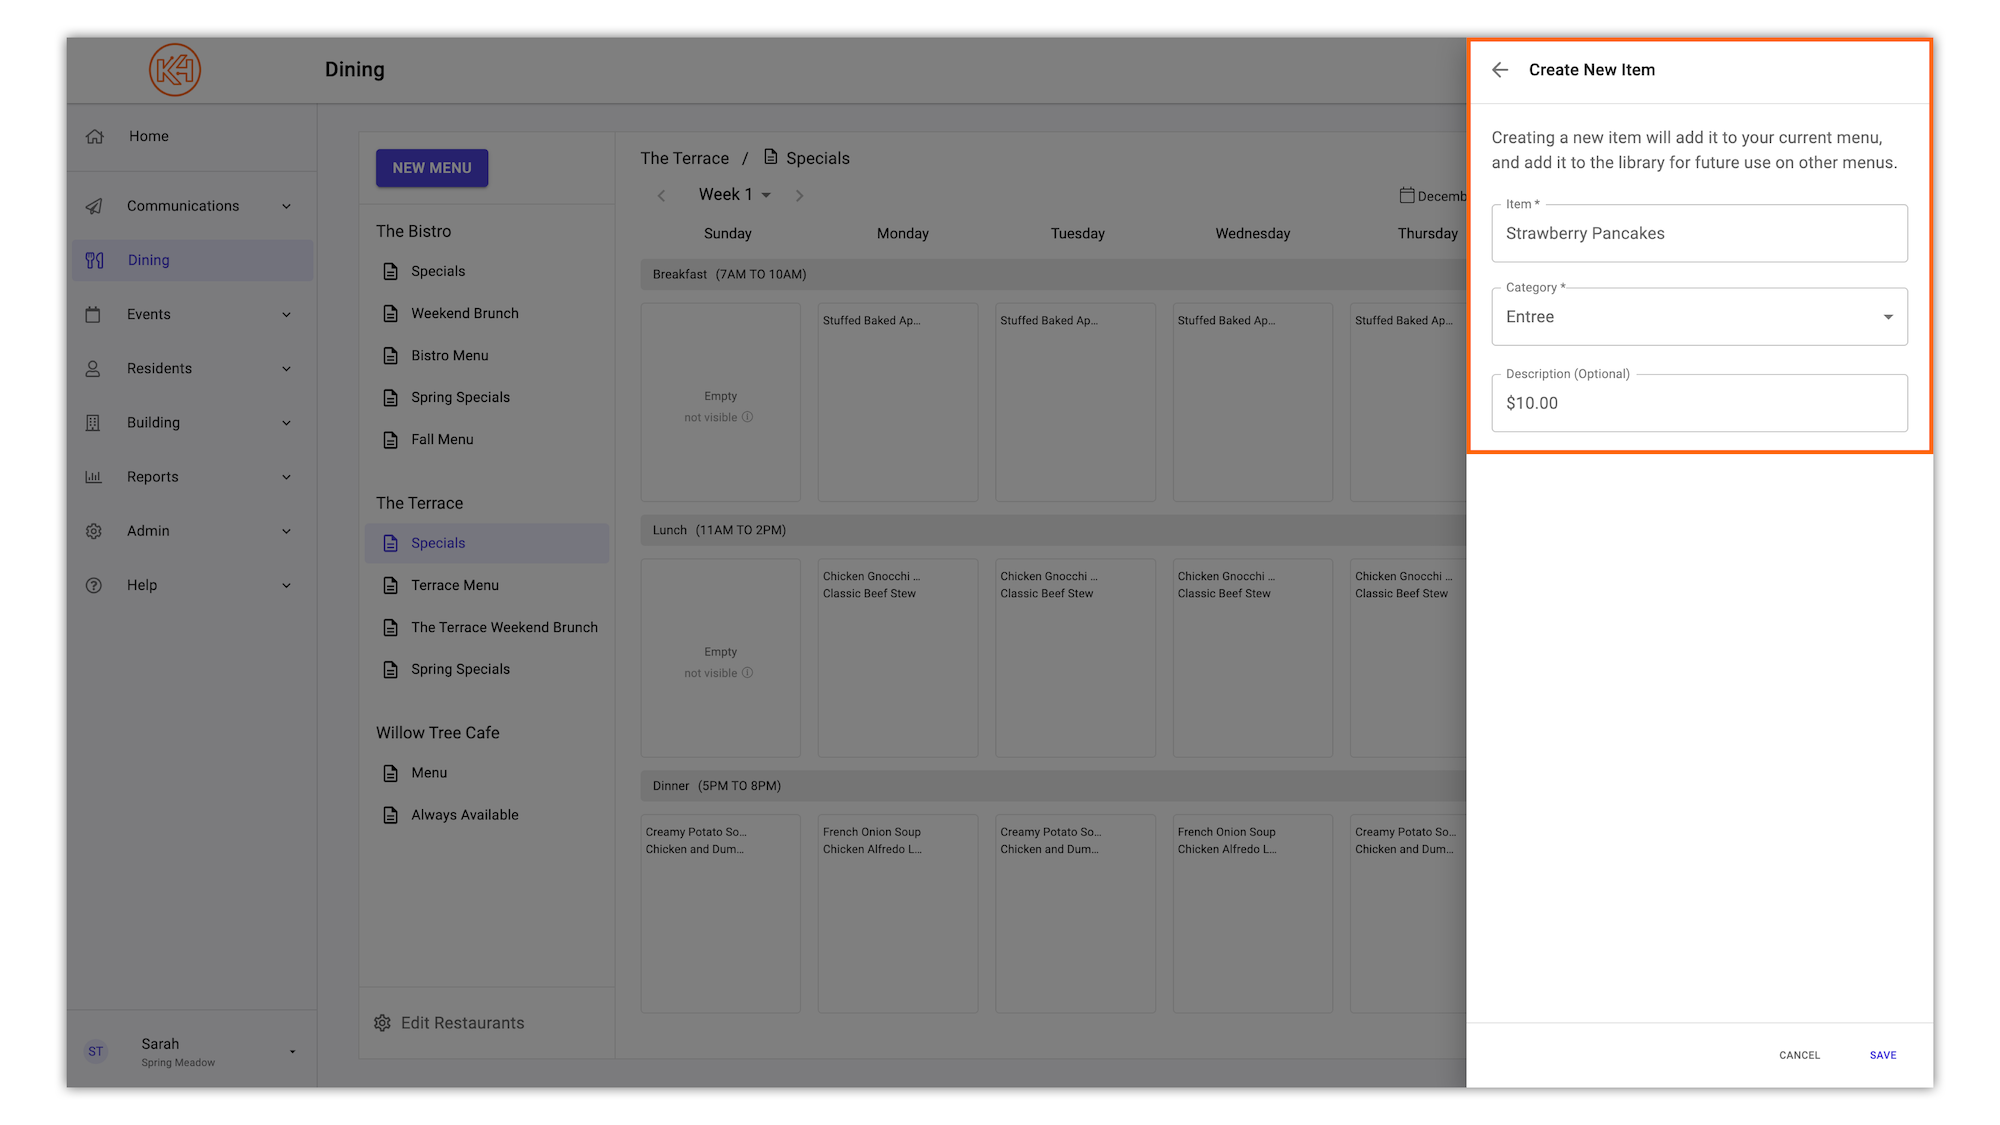
If your item does not already exist in your community's item library, you will be given the option to create a new item that will then be stored for repeatable use.
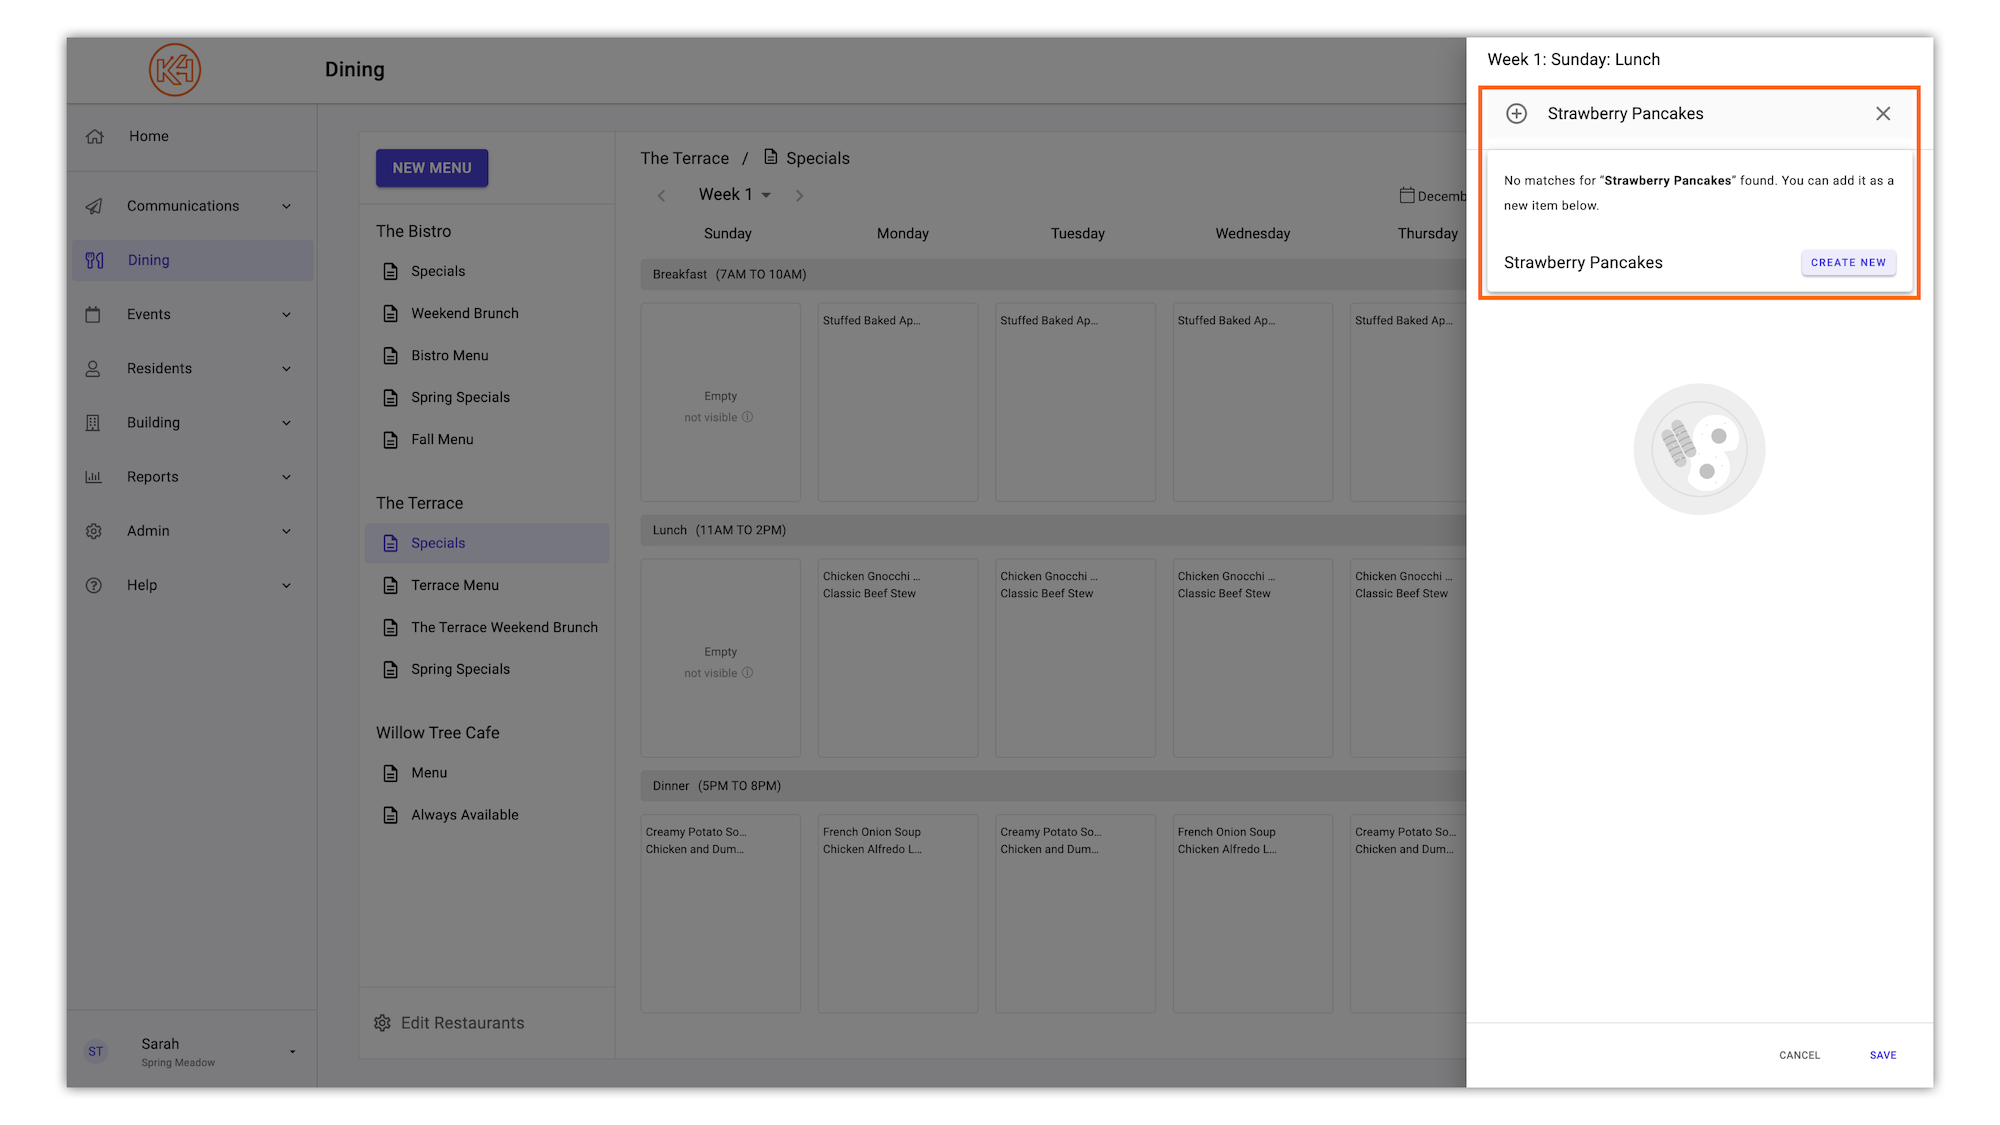
If creating a new menu item, you will be prompted to assign a category and an optional description. When you are satisfied with the item entry, click 'Save'.
🪄 Pro Tip: Consider adding a description if you would like to add a dollar amount or point amount per item. This description is visible in K4Community Plus and the Daily Dining Widget.
Once you are satisfied with your items, click 'Save' to populate the meal.