
Resident Groups provide a way for community staff to control the visibility of information, ensuring that only content pertinent to a specific group of residents is accessible to them within the K4Community Plus app.
Create a Resident Group
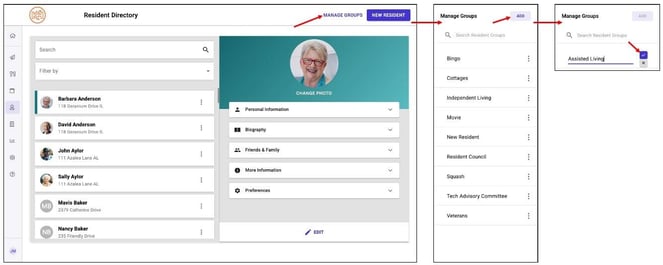
- Go to the Resident Directory section of Team Hub
- Click on Manage Groups
- Click Add
- Enter the name of the resident group and click the check mark to save
Your new resident group will be available in the Resident Group dropdown when editing the resident's profile. Residents can be added to one or more Resident Groups.
Managing Resident Groups
Edit
To edit a resident group:
- Click on the 3-dot menu beside the group name
- Edit the name of the group
- Click the check mark to save your changes

Delete
To delete a residnet group:
- Click on the 3-dot menu beside the group name
- Click Delete of the group
- Click Confirm Delete to remove the group
Deleting a resident group will remove all residents from the group. Content targeted to the deleted group will be visible to all residents. This action cannot be undone.
